(Emotional, curiosity-triggering, and benefit-focused)
Looking for a meal that’s quick, fun, and super tasty? Say hello to cheeseburger pockets! These little baked wonders have all the good stuff you love in a cheeseburger—like juicy beef, melted cheese, and soft bread—but wrapped into a handheld pocket. In addition, whether you’re cooking for your kids, meal prepping for the week, or throwing a game-day party, cheeseburger pockets are a big win.
In this article, we’ll break down:
What cheeseburger pockets are
What ingredients you need
How to make them (with step-by-step help!)
Yummy variations and sides
Storage tips, nutrition, and more
Before we jump into the nitty-gritty, here’s a little story…
👨🍳 Chef Carla’s Take on Cheeseburger Pockets: “I first made cheeseburger pockets when my twins were in second grade. They were picky eaters, and I was so tired of chicken nuggets. These pockets changed everything! They’re quick, customizable, and the kids LOVED helping me make them. Since then, even the grown-ups ask for them during family get-togethers!”
So, let’s dig in!
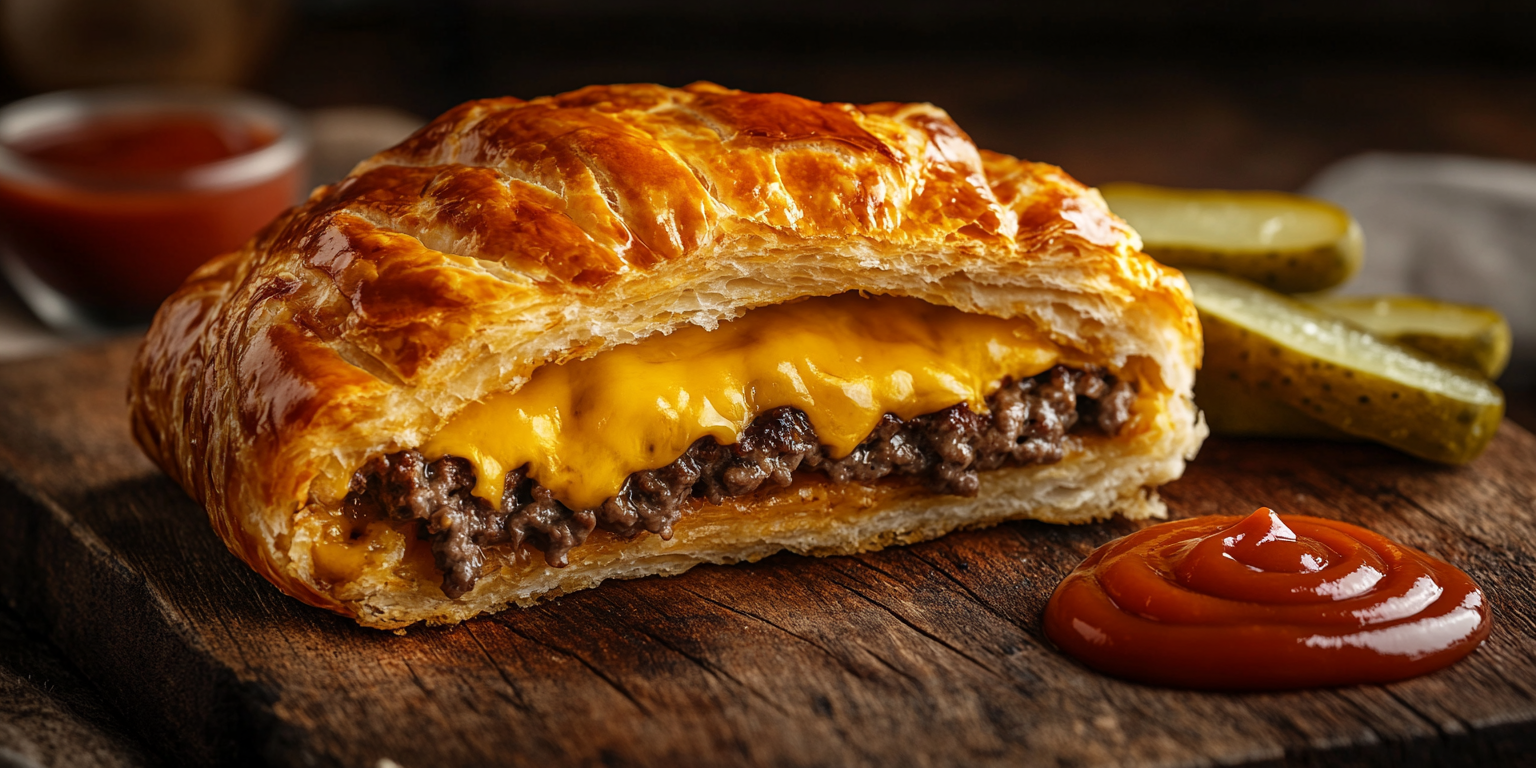
What Are Cheeseburger Pockets?
Cheeseburger pockets are like a burger meets hot pocket, and honestly? They’re kind of genius. Basically, all the good stuff gets wrapped in dough, sealed up, and baked until golden. Think of them as cheeseburger hand pies—great for eating on the go, or with your favorite dip at home.
A Fun Twist on a Classic Burger
You know cheeseburgers, right? Now, picture all that deliciousness—beef, cheese, onions, ketchup—sealed inside fluffy biscuit or crescent roll dough. As a result, it’s like a snack, lunch, and dinner all rolled into one. These little guys are:
Portable
Freezer-friendly
Super kid-friendly
Perfect for picky eaters
Moreover, they’re easy enough to make even if you’ve never cooked before!
💡 Pro Tip: If you’ve ever had a stuffed sandwich or savory turnover, cheeseburger pockets are right up your alley.
Where Did Cheeseburger Pockets Come From?
There’s no fancy origin story here. Cheeseburger pockets popped up when creative home cooks started wrapping leftover burger ingredients into store-bought dough to save time—and ended up loving the results! Eventually, big brands like Pillsbury and food bloggers added their own twists, like puff pastry or bacon.
Therefore, what started as a “lazy dinner” hack quickly became a go-to meal in many homes.
In the next part, we’ll take a look at what you’ll need to get started—with a super helpful ingredients and nutrition table included. Ready? Let’s roll!
Ingredients You’ll Need for Cheeseburger Pockets
So, you’re ready to cook up some cheeseburger pockets? Awesome! But first, let’s make sure you’ve got everything you need. The great thing about this recipe is that it’s super flexible. In fact, you can stick with the basics or add your own tasty twist. Either way, it’s hard to mess up.
Basic Ingredients List (From Most Recipes Online)
You probably have most of these in your kitchen already. However, if not, they’re easy to find at any grocery store.
Ingredient
Quantity
Notes
Ground beef (85% lean)
1 pound
Can use turkey or chicken, too
Shredded cheddar cheese
1 to 1½ cups
Or mix cheeses for more flavor
Refrigerated dough
1 package (8 pieces)
Biscuits or crescent rolls
Onion (finely chopped)
¼ cup
Optional, but adds good flavor
Ketchup
2 tablespoons
Adds sweetness and moisture
Garlic (minced)
2 cloves
Optional for extra flavor
Salt & pepper
To taste
Keep it simple!
Pro Tip: For even more flavor, try adding a splash of Worcestershire sauce or your favorite burger seasoning blend.
Optional Add-ins to Make It Your Own
Let’s be honest—customizing your cheeseburger pockets is half the fun! Therefore, here are some tasty ideas to take your pockets to the next level:
Chopped pickles – For a classic burger zing
Crispy bacon bits – Because, well, bacon
Spicy mustard or hot sauce – For a little kick
Sautéed mushrooms – A grown-up twist
💬 Love mushroom flavors? Then you’ll enjoy this Creamy Mushroom Lasagna from SimplyUSARecipes.com—it’s another cozy meal idea perfect for dinner nights!
How to Make Cheeseburger Pockets (Step-by-Step)
Now that your ingredients are ready, let’s start cooking! Making cheeseburger pockets might sound fancy, but it’s really just three easy steps: cook the beef, wrap it in dough, and bake.
Prep and Cook the Beef Filling
Start with your ground beef. First, heat a large pan over medium heat. Add the beef and break it apart as it cooks. Then, toss in the chopped onion and minced garlic (if using). Cook everything until the beef is browned and the onions are soft.
After that, stir in your ketchup, salt, pepper, and any other add-ins you like (like pickles or seasoning). Once it’s mixed well and smells amazing, remove it from the heat. Meanwhile, let it cool a bit so the cheese won’t melt too fast when you mix it in.
🧀 Don’t forget the cheese! Stir in shredded cheddar while the beef is still warm so it gets all melty and gooey.
Building the Pocket with Dough
Meanwhile, preheat your oven to 375°F (190°C). Open your package of refrigerated biscuit or crescent dough. Flatten each piece slightly using your hands or a rolling pin.
Now comes the fun part:
Scoop a heaping spoonful of the meat mixture into the center of each dough round.
Then, fold the dough over the filling like a taco or press into a pocket shape.
Finally, seal the edges with a fork by pressing down gently. This helps the filling stay in during baking.
Place your cheeseburger pockets on a parchment-lined baking sheet. Additionally, for an extra golden crust, brush the tops with a bit of beaten egg or melted butter.
Baking or Air Frying: Your Choice!
Finally, slide the tray into the oven and bake for 12–15 minutes, or until the tops are golden brown and delicious.
Alternatively, if you’re using an air fryer, cook them at 350°F (175°C) for about 8–10 minutes. Just don’t overcrowd the basket!
💡 Want them even crispier? A light sprinkle of sesame seeds or grated cheese on top before baking works wonders.
Variations of Cheeseburger Pockets
One of the best things about cheeseburger pockets is how flexible they are. In fact, you can change them up in so many fun and tasty ways! Whether you’re craving something smoky, cheesy, or a bit fancy, there’s a version that fits your mood.
Bacon Cheeseburger Pockets
Let’s be honest—everything’s better with bacon. So, if you’re already a fan of classic cheeseburgers, adding crispy bacon is a no-brainer.
Here’s how to make it:
Cook your bacon until it’s crispy, then crumble it into your beef and cheese mix.
You can also sprinkle some on top before baking for extra crunch.
Moreover, bacon adds that salty, smoky bite that makes each pocket feel like a full-on burger feast.
Puff Pastry Cheeseburger Pockets
Looking to impress guests or just feel a little fancy at dinner? Then, puff pastry is your new best friend.
Unlike biscuit dough, puff pastry is light and flaky. As a result, it gives your cheeseburger pockets a buttery crunch with every bite.
To use it:
Roll out your puff pastry and cut into squares.
Add your beef-cheese mix and fold over like a triangle.
Seal the edges and bake until golden.
Although it sounds a bit more gourmet, it’s just as easy to make—and totally delicious!
Mini Cheeseburger Pockets for Kids
Sometimes kids want fun-sized food. Therefore, mini cheeseburger pockets are a perfect lunchbox treat or party snack.
Here’s what to do:
Cut your dough into smaller circles or squares.
Use a teaspoon of filling in each.
Bake them for slightly less time (about 10 minutes).
Not only are they adorable, but they also disappear fast—so, make extras!
Dips, Sauces, and Sides That Go Great
So, you’ve got your warm, cheesy cheeseburger pockets ready. But now, let’s make them even more awesome with dips and sides. These little extras, in fact, turn a simple snack into a full-on meal.
Best Sauces to Dip Cheeseburger Pockets In
Dipping makes everything better, right? That’s why, having a few sauce options can take your meal to the next level.
Try these fun pairings:
Ketchup and mustard – Just like a regular cheeseburger
Burger sauce – Mix mayo, ketchup, and relish for a creamy dip
Ranch dressing – Especially good with bacon or spicy versions
Cheese sauce – For extra cheesy bites
In addition, spicy dips like sriracha mayo or jalapeño ranch are perfect for grown-ups who love a little heat.
Tasty Sides to Complete the Meal
If you’re serving cheeseburger pockets for dinner, you might want to add some easy sides. On the other hand, you don’t need anything fancy.
Here are some simple, tasty picks:
French fries or tater tots – Classic burger buddies
A green salad – To add something fresh and crunchy
Mac and cheese – Because more cheese is always good
Fruit salad – A sweet and light side for kids
That way, everyone at the table gets a full meal with flavors that go great together.
🍽️ Want more delicious family-friendly meals? Check out the creamy mac and cheese recipe from Simply USA Recipes—it makes a perfect side dish for cheeseburger pockets!
Make-Ahead, Freeze, and Reheat Tips
Life can get busy, right? That’s why make-ahead meals are total lifesavers. Cheeseburger pockets are perfect for this! You can make a bunch at once, freeze them, and just reheat when you’re hungry.
How to Store and Freeze Cheeseburger Pockets
Once your cheeseburger pockets are baked and cooled, you’ve got two choices: keep them in the fridge for a few days or freeze them for later.
Here’s how to do both:
Refrigerate: Place cooled pockets in an airtight container or zip-top bag. That way, they’ll stay fresh for up to 3–4 days.
Freeze: Wrap each pocket in foil or plastic wrap, then place them all in a freezer bag. In addition, this prevents them from sticking together. They’ll last up to 2 months in the freezer.
Moreover, don’t forget to label the bag with the date—so you know when it’s time to eat them up!
🧊 Freezing tip: Flash-freeze the pockets on a tray for 30 minutes before bagging them. This way, they keep their shape better.
Best Ways to Reheat Without Getting Soggy
Nobody likes a soggy pocket. So, reheating the right way is key to keeping that yummy, crispy outside.
Try one of these:
Oven (best for crispiness): Preheat to 350°F (175°C) and bake for 10–12 minutes.
Air fryer: Pop one in at 350°F for 6–8 minutes—easy and fast!
Microwave (quickest): Heat for 1–2 minutes, but the outside may be softer.
However, if you use the microwave, you can always pop the pocket in the toaster oven after for a minute or two to get that golden finish back.
Cheeseburger Pockets for Parties & Lunchboxes
Cheeseburger pockets aren’t just great for dinner—they’re also super fun for parties, picnics, and lunchboxes. Because they’re easy to carry and mess-free, they work in so many settings!
Easy to Make Ahead and Serve at Events
Planning a game night, birthday party, or sleepover? Then, cheeseburger pockets should be on your list.
Why they work:
They’re small and handheld—no forks needed!
You can make them ahead and reheat as guests arrive.
Everyone can pick their favorite filling (like bacon, veggies, or extra cheese).
In fact, you could even set up a “build-your-own-pocket” bar where guests choose their ingredients. Fun, right?
🥳 Pro tip: Make mini versions for bite-sized party snacks!
Kid-Approved and Lunchbox-Ready
Packing lunch doesn’t have to be boring. Instead of plain sandwiches, add a cheeseburger pocket to the mix.
They’re:
Just the right size for little hands
Tasty warm or cold
Less messy than a regular burger
Plus, you can sneak in healthy stuff like chopped veggies or lean ground turkey, and kids will still love them.
On the whole, cheeseburger pockets are a win-win for busy mornings and happy tummies at school.
Nutrition and Healthier Swaps
Let’s be honest—cheeseburger pockets aren’t just tasty, they can also be surprisingly balanced if you make a few smart swaps. Of course, they’ll still taste great!
What’s Inside a Cheeseburger Pocket (Nutrition Facts)
Here’s a simple look at what you might find in one average-sized cheeseburger pocket made with ground beef, cheese, and dough:
Nutrient
Approx. Value (per pocket)
Calories
280–350 kcal
Protein
12–16g
Fat
15–18g
Carbs
20–25g
Fiber
1–2g
Sugar
2–4g
Sodium
400–600mg
Keep in mind, numbers can vary based on the dough and cheese you use. In other words, these values are just estimates.
How to Make It Healthier (If You Want)
Want to enjoy cheeseburger pockets but keep things a bit lighter? No problem! You can still get that yummy flavor with a few simple tweaks.
Here are some healthy swap ideas:
Use lean ground turkey or chicken instead of beef
Swap cheddar for low-fat mozzarella
Choose whole wheat or gluten-free dough
Add finely chopped veggies, like spinach or peppers, to the filling
Go easy on salty sauces like ketchup or mustard
As a result, you’ll still get the fun and flavor of cheeseburger pockets—but with fewer calories and more nutrients.
Moreover, these swaps are simple enough that even picky eaters won’t notice a huge difference.
Cheeseburger Pocket Hacks and Tips
Okay, now you’re getting the hang of making cheeseburger pockets. However, even the best cooks can use a few pro tips to avoid common mistakes. Let’s look at what to watch out for—and fun ways to make your pockets even better!
Common Mistakes and How to Avoid Them
Sometimes things don’t turn out quite right. However, don’t worry! These little mistakes are easy to fix next time.
Soggy bottoms? Try baking on a preheated baking sheet to crisp up the dough.
Filling spilling out? Make sure you don’t overfill, and press the edges tightly with a fork.
Dough still raw inside? Lower your oven temp and bake a bit longer.
Cheese leaking? Add the cheese in the middle of the filling and seal tightly.
In short, a little care in sealing and baking goes a long way!
Additionally, try letting the filling cool slightly before wrapping—it helps prevent soggy pockets.
Creative Ways to Upgrade the Recipe
Want to have some fun in the kitchen? Then, try these cool twists on the classic pocket:
Spicy twist: Add a little jalapeño or chili flakes
BBQ-style: Swap ketchup for BBQ sauce
Pizza-style: Use pizza sauce and pepperoni in the filling
Cheeseburger breakfast pocket: Add scrambled eggs and hash browns!
In addition, you can try shaping the pockets differently—circles, triangles, or even little squares.
✨ Remember: The best part of making cheeseburger pockets is that you can make them your own every single time.
🟡 Final Thoughts – Why Everyone Loves Cheeseburger Pockets
By now, you’ve seen just how awesome cheeseburger pockets can be. They’re fast, fun, and flexible—perfect for kids, adults, parties, or just a quiet night at home. From customizing the fillings to picking your own sides and sauces, the options are endless.
Therefore, whether you’re a beginner in the kitchen or a busy parent needing quick meals, cheeseburger pockets are a must-try. You can make them healthier, freeze them for later, and enjoy them anywhere.
So, go ahead—grab your dough, your beef, and your cheese. It’s time to make magic in your kitchen.